
It depends less on the digging than on what comes before it. In Ontario, most fences over 3 feet need a city building permit, a DigAlert ticket needs at least two working days’ notice, and an HOA may review the design. On site, footage, gates, tear-out, slope and concrete curing time set the pace.
Grove Ontario Fence Builders installs fences and gates across Ontario and the west Inland Empire, with the work carried out by licensed and insured fence contractors. This guide walks through how a project runs, from the first call to the final walk of the line, and explains what makes each step shorter or longer. It gives no promised durations, because a fence’s schedule depends on the property, the approvals and the material.
The five stages and what each one waits on
| Stage | What happens | What sets how long it takes |
|---|---|---|
| First call | Address, fence length, height and material, plus photos if you have them | Mostly how quickly the basics and photos come together |
| Site walk and layout | The line is walked and measured, gates and slopes marked, and survey questions raised where the line is unclear | Whether the property line is clear, and whether a survey is needed |
| Permits, HOA and DigAlert | The permit and any HOA approval are lined up, and DigAlert marks utilities before digging | The city’s review, the HOA’s meeting schedule and the two-working-day DigAlert notice |
| Posts, then panels | Posts are set and cured before rails, boards or panels go on, and gates are hung last | Footage, gates, tear-out, access, soil, slope, curing and material lead time |
| Walk-through | The finished line, gate swing and latches are checked with you, and debris is hauled away | Any adjustments, and the final inspection the permit calls for |
Before any digging: approvals and notices
Ontario’s Building Permit FAQ requires a building permit for wood, chain link and wrought iron fences and gates over 3 feet, and for block walls over 3 feet, so nearly every backyard privacy fence goes through the counter with a site plan. The city’s Planning side also reviews the design and location of every fence, permit or not. How long review takes depends on the city’s workload and how complete the plan is, which is why the line is measured and drawn before anything is ordered. The permit and height rules guide explains what the city checks.
Two other clocks can run in parallel. In master-planned tracts such as Ontario Ranch, an architectural review committee may need to approve the material, color and height first; the HOA fence approval guide covers a typical submittal. And if a neighbor will share the cost of a dividing fence, California’s Civil Code 841 calls for 30 days’ written notice before the work, as the good neighbor fence law guide explains.
The last notice before digging is DigAlert. California Government Code 4216.2 requires an excavator, which includes anyone augering post holes, to mark the area and notify the regional center at least two working days and no more than 14 calendar days before starting, not counting the day of notice. A DigAlert ticket stays valid for 28 days and is renewed if the job runs longer. Utilities then mark their lines; private lines, such as sprinkler pipes, landscape lighting or a gas line to a grill, are not marked and need to be pointed out by the owner.
Material is the other lead time. Common wood, vinyl and chain link materials are widely stocked, while custom iron gates, powder-coated finishes and particular vinyl colors can take longer to arrive.
Layout: string lines, corners and gates
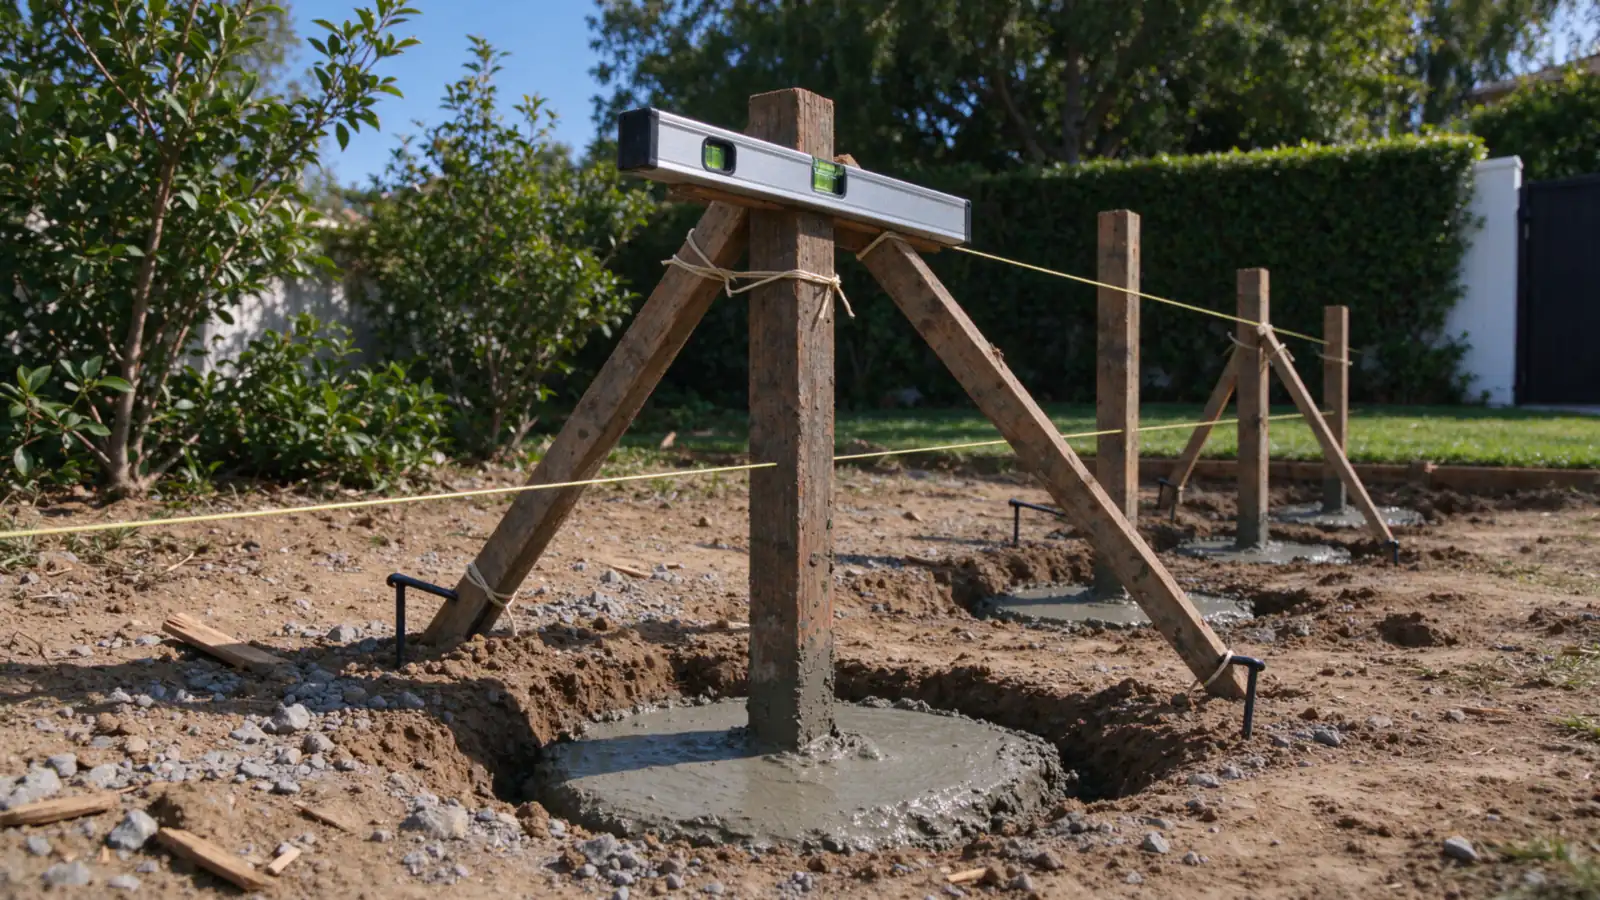
Layout fixes where every post goes. Stakes go in at the corners, ends and gate openings, and a string line pulled tight between them sets a straight run. Post spacing is marked along the string, with heavier posts at corners, ends and both sides of every gate. Grade changes are noted, because they decide whether sections rack or step. The property line comes first: an old fence does not prove where the line is, and recorded corners or survey monuments are what the layout follows. When the line is in doubt, the property line and survey guide explains when a licensed surveyor is needed.
Post holes in sand
Holes are augered or dug by hand. Hand digging is the method near marked utilities and close to the house, and wherever a machine cannot get through a narrow side yard. USDA soil survey data maps much of central Ontario on Tujunga loamy sand and Ontario Ranch on Delhi fine sand, both loose and fast-draining. The digging is easy, but the sides of a hole can slough in before the concrete goes in, so holes are kept open, sometimes with a form tube, and dug to the depth and width the post plan calls for. On a replacement, old posts and their concrete footings come out first, and how they were set changes how long that takes. Fine sand also blows around while it is being dug, so the spoil is kept covered on windy days.
Setting posts and letting the concrete cure
Each post is set plumb on the string line, braced, and surrounded with concrete crowned at the top so water runs away from the post. The concrete then needs time to cure before rails, boards or panels load it. Hang weight on a post while its footing is still green and it can shift out of line, which shows up later as a wavy top or a gate that will not latch. How long the cure takes depends on the mix, the size of the hole and the weather. Ontario’s heat is a factor: NOAA’s normals for Ontario International Airport average 93 days a year at or above 90°F, and concrete curing in hot, dry air loses water fast at the surface. The steel vs wood posts guide covers how footings are sized.
Rails, pickets, panels and fasteners
Once the posts are firm, the fence itself goes on, and the method depends on the system:
- Wood. On a wood fence, rails are fastened to wood posts or bolted to steel posts through brackets. Pickets go on with hot-dip galvanized or stainless fasteners, because the chemicals in treated lumber corrode plain steel. Privacy boards are butted tight and open small gaps as they dry; board-on-board overlaps them so no gap appears. A cap rail and post caps shed water from end grain.
- Vinyl. On a vinyl fence, rails slot into routed posts, panels lock in, and posts that carry gates or long runs get aluminum or steel inserts. Caps close the post tops.
- Chain link. On a chain link fence, terminal posts at ends, corners and gates are set heavier than line posts, a top rail runs between them, and the fabric is stretched tight and held with tension bars.
- Wire mesh. Ontario’s Development Code allows wire mesh fencing only at 4 by 4 inches in 12.5 gauge or heavier, which rules out lighter welded-wire panels.
Picket spacing matters most at pools. California’s barrier standard in Health and Safety Code 115923 allows no opening that passes a 4-inch sphere and no more than 2 inches of clearance at the ground, so spacing and bottom clearance are set to the rule before the first picket goes on. The pool fence installation page covers that work.
Fences on a slope: racking or stepping
A fence follows a slope one of two ways. Racking tilts the rails parallel to the ground while pickets or balusters stay plumb, so the bottom of the fence follows the grade with no gaps. Wood fences built on site rack easily; prebuilt vinyl and metal panels rack only if the system is made for it, and only to a limit. Stepping keeps each section level and drops it at each post, which works with any panel but leaves a triangular gap under the low end of each section. That gap matters for pets and is a problem at a pool barrier.
Height adds a local wrinkle. Ontario measures fence height from the lowest adjacent finished grade, so the low end of each stepped section is where the height limit is checked. Most of Ontario sits on a fairly flat valley floor, but grade changes between lots, and steeper ground toward the north side of the region, are noted early at layout. On the steep lots of Chino Hills, stepping and footings in shallow bedrock shape almost every job.
Gates last, then the walk-through
Gates are hung after the posts have cured so they close square and stay that way. Hinges, latches, stops and any drop rods are set and adjusted, and a pool gate has to self-close and self-latch before the job is done. The final walk-through checks the line, the gate swing and the latches with you, and debris is hauled away. The permit’s inspections follow. The gate installation page covers gate hardware in more detail.
What makes a fence job take longer
Several conditions stretch the schedule, and most can be seen at the site walk:
- Long footage, many corners and several gates
- Tearing out an old fence with large concrete footings
- One narrow side yard with no rear access, so everything is carried in
- Slopes that need stepped sections or longer posts
- Tree roots, rock or old concrete in the post holes
- Custom iron, powder coating or special-order vinyl
- HOA review, permit corrections or a property line that needs a survey
- High wind days, which the National Weather Service records mostly from October through February in the Inland Empire
Rain is rarely the cause; Ontario averages under 12 inches a year. For a budget alongside the schedule, the fence cost guide and the fence cost estimator use typical local ranges.
When you are ready to start the clock, call Grove Ontario Fence Builders at (909) 324-5352 or request an estimate with the address, the length and the material you have in mind.
Plan your fence from the first call
Share the address, the fence line and the material, and the site walk, permit and DigAlert steps can be lined up.